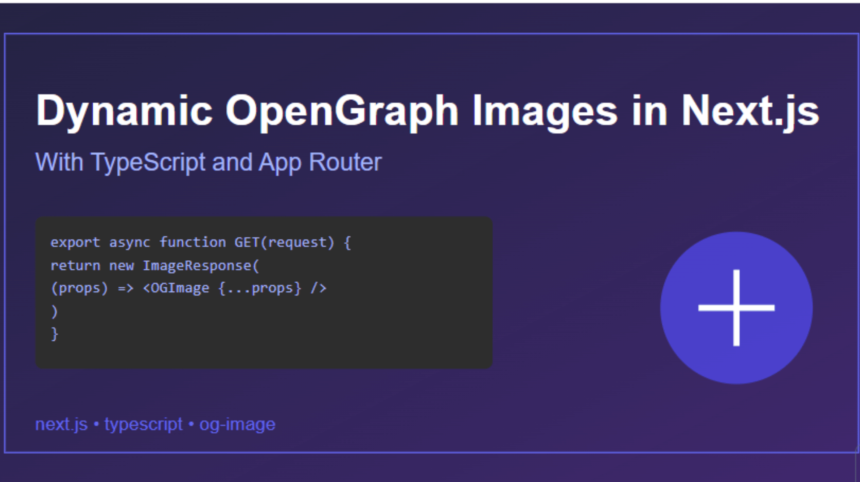
Dynamic OpenGraph images can significantly boost your content’s social media presence and engagement. This comprehensive guide will show you how to implement dynamic OG image generation in Next.js 14+ using the App Router and TypeScript.
Understanding Dynamic OpenGraph Images
OpenGraph images are preview images that appear when sharing links on social media platforms. Dynamic OG images are generated on-demand based on your content, providing fresh and contextual previews for your shared links.
Project Setup
First, create a new Next.js project with TypeScript:
npx create-next-app@latest dynamic-og-nextjs --typescript --tailwind --app
cd dynamic-og-nextjs
npm install @vercel/og
Implementation Steps
1. Create the OpenGraph Route Handler
// app/api/og/route.tsx
import { ImageResponse } from '@vercel/og'
import { NextRequest } from 'next/server'

export const runtime = 'edge'

export async function GET(request: NextRequest) {
  try {
    const { searchParams } = new URL(request.url)

    // Get title from search params
    const title = searchParams.get('title')

    return new ImageResponse(
      (
        <div
          style={{
            height: '100%',
            width: '100%',
            display: 'flex',
            flexDirection: 'column',
            alignItems: 'center',
            justifyContent: 'center',
            backgroundColor: '#fff',
            padding: '40px',
          }}
        >
          <h1
            style={{
              fontSize: '64px',
              fontWeight: 'bold',
              color: '#000',
              textAlign: 'center',
            }}
          >
            {title || 'Default Title'}
          </h1>
        </div>
      ),
      {
        width: 1200,
        height: 630,
      }
    )
  } catch (error) {
    console.error('Error generating OG image:', error)
    return new Response('Failed to generate image', { status: 500 })
  }
}
2. Create OpenGraph Metadata Types
// types/og.ts
export interface OGImageParams {
  title: string
  subtitle?: string
  theme?: 'light' | 'dark'
  template?: 'default' | 'blog' | 'product'
}

export interface OGMetadata {
  title: string
  description: string
  image: string
  url: string
}
3. Implement the OpenGraph Component
// components/OGImage.tsx
import React from 'react'
import { OGImageParams } from '@/types/og'

interface Props {
  style?: React.CSSProperties
  params: OGImageParams
}

export function OGImage({ style, params }: Props) {
  const { title, subtitle, theme = 'light' } = params

  const bgColor = theme === 'light' ? '#ffffff' : '#000000'
  const textColor = theme === 'light' ? '#000000' : '#ffffff'

  return (
    <div
      style={{
        height: '100%',
        width: '100%',
        display: 'flex',
        flexDirection: 'column',
        alignItems: 'center',
        justifyContent: 'center',
        backgroundColor: bgColor,
        padding: '40px',
        ...style,
      }}
    >
      <h1
        style={{
          fontSize: '64px',
          fontWeight: 'bold',
          color: textColor,
          textAlign: 'center',
        }}
      >
        {title}
      </h1>
      {subtitle && (
        <p
          style={{
            fontSize: '32px',
            color: textColor,
            opacity: 0.8,
            textAlign: 'center',
            marginTop: '20px',
          }}
        >
          {subtitle}
        </p>
      )}
    </div>
  )
}
4. Add Dynamic Metadata Generation
// app/[slug]/page.tsx
import { Metadata } from 'next'
import { generateOGMetadata } from '@/utils/metadata'

interface Props {
  params: { slug: string }
}

export async function generateMetadata({ params }: Props): Promise<Metadata> {
  const post = await getPost(params.slug) // Your data fetching logic

  return {
    title: post.title,
    description: post.description,
    openGraph: {
      title: post.title,
      description: post.description,
      images: [{
        url: `${process.env.NEXT_PUBLIC_URL}/api/og?title=${encodeURIComponent(post.title)}`,
        width: 1200,
        height: 630,
      }],
    },
  }
}

export default function PostPage({ params }: Props) {
  // Your page component
}
5. Create a Metadata Utility
// utils/metadata.ts
import { OGMetadata } from '@/types/og'

export function generateOGMetadata(data: Partial<OGMetadata>): OGMetadata {
  const baseUrl = process.env.NEXT_PUBLIC_URL || 'http://localhost:3000'

  return {
    title: data.title || 'Default Title',
    description: data.description || 'Default Description',
    image: data.image || `${baseUrl}/api/og?title=${encodeURIComponent(data.title || '')}`,
    url: data.url || baseUrl,
  }
}
6. Implement Template System
// components/templates/BaseTemplate.tsx
import React from 'react'
import { OGImageParams } from '@/types/og'

export interface TemplateProps {
  params: OGImageParams
  style?: React.CSSProperties
}

export function BaseTemplate({ params, style }: TemplateProps) {
  return (
    <div
      style={{
        height: '100%',
        width: '100%',
        position: 'relative',
        ...style,
      }}
    >
      {/* Base template content */}
    </div>
  )
}
7. Create Custom Templates
// components/templates/BlogTemplate.tsx
import { TemplateProps } from './BaseTemplate'

export function BlogTemplate({ params, style }: TemplateProps) {
  const { title, subtitle, theme = 'light' } = params

  return (
    <div
      style={{
        height: '100%',
        width: '100%',
        display: 'flex',
        flexDirection: 'column',
        padding: '60px',
        background: theme === 'light' ? '#ffffff' : '#000000',
        ...style,
      }}
    >
      <div style={{ flex: 1 }}>
        <h1
          style={{
            fontSize: '72px',
            fontWeight: 'bold',
            color: theme === 'light' ? '#000000' : '#ffffff',
            lineHeight: 1.2,
          }}
        >
          {title}
        </h1>
        {subtitle && (
          <p
            style={{
              fontSize: '36px',
              color: theme === 'light' ? '#666666' : '#cccccc',
              marginTop: '20px',
            }}
          >
            {subtitle}
          </p>
        )}
      </div>
      {/* Add your blog template specific elements here */}
    </div>
  )
}
8. Add Font Loading Support
// utils/fonts.ts
import { fetchFont } from '@vercel/og'

export async function loadFonts() {
  const interRegular = await fetchFont({
    family: 'Inter',
    weight: 400,
    text: 'abcdefghijklmnopqrstuvwxyzABCDEFGHIJKLMNOPQRSTUVWXYZ0123456789.,!?-_/\\',
  })

  const interBold = await fetchFont({
    family: 'Inter',
    weight: 700,
    text: 'abcdefghijklmnopqrstuvwxyzABCDEFGHIJKLMNOPQRSTUVWXYZ0123456789.,!?-_/\\',
  })

  return { interRegular, interBold }
}
9. Implement Caching
// app/api/og/route.tsx
import { ImageResponse } from '@vercel/og'
import { NextRequest } from 'next/server'

export const runtime = 'edge'

// Enable caching for production
export async function GET(request: NextRequest) {
  try {
    const response = await generateOGImage(request)

    // Cache for 1 hour in production
    if (process.env.NODE_ENV === 'production') {
      response.headers.set(
        'Cache-Control',
        'public, max-age=3600, s-maxage=3600, stale-while-revalidate=3600'
      )
    }

    return response
  } catch (error) {
    console.error('Error generating OG image:', error)
    return new Response('Failed to generate image', { status: 500 })
  }
}
10. Add Error Handling
// utils/error.ts
export class OGImageError extends Error {
  constructor(
    message: string,
    public statusCode: number = 500
  ) {
    super(message)
    this.name = 'OGImageError'
  }
}

export function handleOGImageError(error: unknown) {
  if (error instanceof OGImageError) {
    return new Response(error.message, { status: error.statusCode })
  }

  console.error('Unexpected error:', error)
  return new Response('Internal Server Error', { status: 500 })
}
11. Implement Image Optimization
// utils/optimization.ts
interface OptimizationOptions {
  quality?: number
  format?: 'jpeg' | 'png'
}

export function getOptimizedImageConfig(options: OptimizationOptions = {}) {
  const { quality = 90, format = 'png' } = options

  return {
    width: 1200,
    height: 630,
    embedFont: true,
    debug: process.env.NODE_ENV === 'development',
    format,
    quality,
  }
}
12. Add Rate Limiting
// middleware.ts
import { NextResponse } from 'next/server'
import type { NextRequest } from 'next/server'

const rateLimit = {
  windowMs: 60 * 1000, // 1 minute
  max: 100 // limit each IP to 100 requests per windowMs
}

const inMemoryStore = new Map()

export function middleware(request: NextRequest) {
  if (request.nextUrl.pathname.startsWith('/api/og')) {
    const ip = request.ip ?? '127.0.0.1'
    const now = Date.now()
    const timestamps = inMemoryStore.get(ip) || []

    // Clean old requests
    const recentTimestamps = timestamps.filter(
      (timestamp: number) => now - timestamp < rateLimit.windowMs
    )

    if (recentTimestamps.length >= rateLimit.max) {
      return new NextResponse('Too Many Requests', { status: 429 })
    }

    recentTimestamps.push(now)
    inMemoryStore.set(ip, recentTimestamps)
  }

  return NextResponse.next()
}
13. Environment Configuration
// .env.local
NEXT_PUBLIC_URL=http://localhost:3000
NEXT_PUBLIC_OG_IMAGE_WIDTH=1200
NEXT_PUBLIC_OG_IMAGE_HEIGHT=630
14. Testing Setup
// __tests__/og.test.tsx
import { render } from '@testing-library/react'
import { OGImage } from '@/components/OGImage'

describe('OGImage', () => {
  it('renders with default props', () => {
    const { container } = render(
      <OGImage
        params={{
          title: 'Test Title',
        }}
      />
    )
    expect(container).toBeInTheDocument()
  })

  it('renders with custom theme', () => {
    const { container } = render(
      <OGImage
        params={{
          title: 'Test Title',
          theme: 'dark',
        }}
      />
    )
    expect(container).toBeInTheDocument()
  })
})
15. Usage Example
// app/page.tsx
import { Metadata } from 'next'

export const metadata: Metadata = {
  title: 'My Website',
  description: 'Welcome to my website',
  openGraph: {
    title: 'My Website',
    description: 'Welcome to my website',
    images: [{
      url: '/api/og?title=Welcome to my website',
      width: 1200,
      height: 630,
    }],
  },
}

export default function HomePage() {
  return (
    <div>
      <h1>Welcome to my website</h1>
      {/* Your page content */}
    </div>
  )
}
Conclusion
Dynamic OpenGraph images can significantly improve your content’s social media presence. By following this guide, you’ve learned how to implement a robust OG image generation system using Next.js App Router and TypeScript. Remember to optimize for performance and implement proper error handling for production use.


