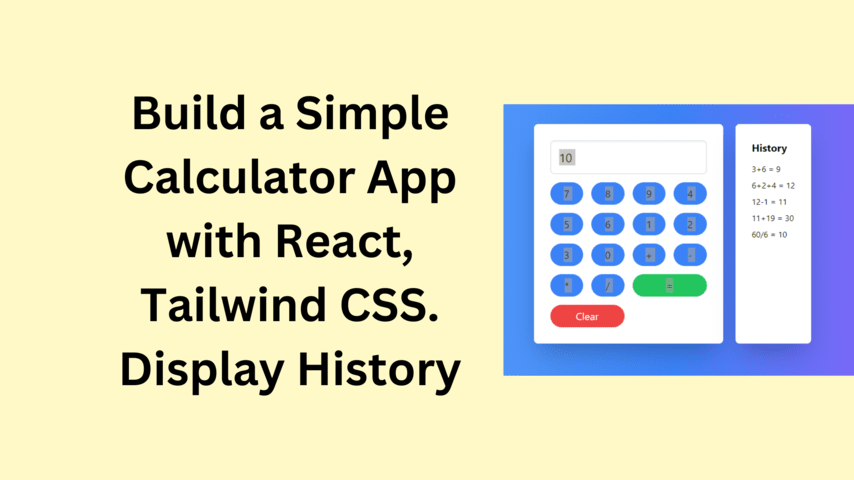
Intro – Build a Simple Calculator App with React, Tailwind CSS
In this tutorial, we’ll be using React, a popular JavaScript library, along with Tailwind CSS for styling, to create a simple calculator that also displays a history of calculations.
Getting Started
Before diving in, make sure you have the following prerequisites installed:
- Node.js and npm
- A code editor like Visual Studio Code
- Basic understanding of React and JavaScript
Setting up the Project
First, let’s create a new React project using Create React App, and install Tailwind CSS.
npx create-react-app simple-calculator
cd simple-calculator
npx tailwindcss init -p
Designing the Calculator Component
Create a new file SimpleCalculator.tsx in the src directory. Now let’s start by importing the necessary dependencies and setting up our main calculator component.
import { useState } from "react";

interface CacheItem {
    expression: string;
    result: string;
}

const calculatorValues = [
    "7", "8", "9", "4", "5", "6", "1", "2", "3", "0", "+", "-", "*", "/"
];

function SimpleCalculator() {
    const [input, setInput] = useState<string>("");
    const [cache, setCache] = useState<CacheItem[]>([]);
}
Building the Logic
Our calculator will have basic arithmetic operations. The evaluateExpression function will parse and evaluate the expression in the input. For simplicity, we’ll use the eval function, but keep in mind, it’s not recommended for production due to security concerns.
function evaluateExpression() {
    // Get the last character of the input after trimming any whitespace
    const lastChar = input.trim().slice(-1);
    // Define the operators that are allowed in the expression
    const operators = ["+", "-", "*", "/"];

    // Check if the expression ends with an operator
    if (operators.includes(lastChar)) {
        // If so, log an error to the console and exit the function early
        console.error("Expression ends with an operator, cannot evaluate.");
        return;
    }

    try {
        // Attempt to evaluate the expression
        // Note: It's recommended to avoid the use of eval due to security risks,
        // and consider using a safer evaluation method instead
        // The eslint-disable-next-line no-eval comment disables the eslint warning about using eval
        // eslint-disable-next-line no-eval
        const result = eval(input.replace(/\s/g, ""));  // Remove any whitespace from the input before evaluating

        // Update the cache state with the new expression and result
        setCache((prevCache) => [
            ...prevCache,
            { expression: input, result },
        ]);

        // Update the input state with the result, converted to a string
        setInput(result.toString());
    } catch (e) {
        // If an error occurs while evaluating, log the error to the console
        console.error("Error evaluating expression:", e);
    }
}
Handling User Interaction
We’ll set up a function onButtonClick to handle button clicks, updating the input based on the button clicked.
   function onButtonClick(value) {
    // Define the operators that are allowed in the expression
    const operators = ["+", "-", "*", "/"];
    // Get the last character of the current input
    const lastChar = input[input.length - 1];

    // Check if the clicked button is an operator
    if (operators.includes(value)) {
        // If so, check if the last character of the current input is also an operator
        if (operators.includes(lastChar)) {
            // If the last character is an operator, replace it with the new operator
            setInput(input.slice(0, -1) + value);
        } else {
            // If the last character is not an operator, append the new operator to the input
            setInput(input + value);
        }
    } else {
        // If the clicked button is not an operator, append the value to the input
        setInput(input + value);
    }
}
Rendering the UI
Now, let’s lay out our calculator and history component using Tailwind CSS for styling.
return (
        <div className="min-h-screen flex items-center justify-center bg-gradient-to-r from-blue-400 via-blue-500 to-purple-500">
            <div className="flex flex-col md:flex-row gap-2">
                <div className="p-8 bg-white rounded-lg shadow-2xl mr-4">
                    <input
                        type="text"
                        readOnly
                        value={input}
                        className="w-full p-4 text-2xl border border-gray-300 rounded-lg mb-4 shadow-inner"
                    />
                    <div className="grid grid-cols-4 gap-4">
                        {calculatorValues.map((item, index) => (
                            <button
                                key={index}
                                onClick={() => onButtonClick(item)}
                                className="py-2 px-4 text-xl bg-blue-500 text-white rounded-full transition duration-300 ease-in-out transform hover:bg-blue-600 active:scale-95"
                            >
                                {item}
                            </button>
                        ))}
                        <button
                            onClick={evaluateExpression}
                            className="col-span-2 py-2 px-4 text-xl bg-green-500 text-white rounded-full transition duration-300 ease-in-out transform hover:bg-green-600 active:scale-95"
                        >
                            =
                        </button>
                        <button
                            onClick={() => setInput("")}
                            className="col-span-2 py-2 px-4 text-xl bg-red-500 text-white rounded-full transition duration-300 ease-in-out transform hover:bg-red-600 active:scale-95"
                        >
                            Clear
                        </button>
                    </div>
                </div>
                <div className="p-8 bg-white rounded-lg shadow-2xl">
                    <h2 className="mb-4 text-xl font-bold">History</h2>
                    <ul>
                        {cache.map((item, index) => (
                            <li key={index} className="mb-2">
                                {item.expression} = {item.result}
                            </li>
                        ))}
                    </ul>
                </div>
            </div>
        </div>
    );
Import the SimpleCalculator component into your App.tsx file, you would use an import statement at the top of the file. Here is how you would do it:
import React from 'react';
import SimpleCalculator from './SimpleCalculator';  // Assuming SimpleCalculator.js is in the same directory as App.tsx

function App() {
  return (
    <div className="App">
      <SimpleCalculator />
    </div>
  );
}

export default App;
Complete Code
import { useState } from "react";
interface CacheItem {
    expression: string;
    result: string;
}
const calculatorValues = [
    "7",
    "8",
    "9",
    "4",
    "5",
    "6",
    "1",
    "2",
    "3",
    "0",
    "+",
    "-",
    "*",
    "/",
];
function SimpleCalculator() {
    const [input, setInput] = useState<string>("");
    const [cache, setCache] = useState<CacheItem[]>([]);

    function evaluateExpression() {
        const lastChar = input.trim().slice(-1);
        const operators = ["+", "-", "*", "/"];

        if (operators.includes(lastChar)) {
            console.error("Expression ends with an operator, cannot evaluate.");
            return;
        }

        try {
            // eslint-disable-next-line no-eval
            const result = eval(input.replace(/\s/g, ""));
            setCache((prevCache) => [
                ...prevCache,
                { expression: input, result },
            ]);
            setInput(result.toString());
        } catch (e) {
            console.error("Error evaluating expression:", e);
        }
    }

    function onButtonClick(value) {
        const operators = ["+", "-", "*", "/"];
        const lastChar = input[input.length - 1];

        if (operators.includes(value)) {
            if (operators.includes(lastChar)) {
                setInput(input.slice(0, -1) + value); // Replace the last operator with the new operator
            } else {
                setInput(input + value);
            }
        } else {
            setInput(input + value); // SimpleCalculatorend the digit or operator to the input
        }
    }

    return (
        <div className="min-h-screen flex items-center justify-center bg-gradient-to-r from-blue-400 via-blue-500 to-purple-500">
            <div className="flex flex-col md:flex-row gap-2">
                <div className="p-8 bg-white rounded-lg shadow-2xl mr-4">
                    <input
                        type="text"
                        readOnly
                        value={input}
                        className="w-full p-4 text-2xl border border-gray-300 rounded-lg mb-4 shadow-inner"
                    />
                    <div className="grid grid-cols-4 gap-4">
                        {calculatorValues.map((item, index) => (
                            <button
                                key={index}
                                onClick={() => onButtonClick(item)}
                                className="py-2 px-4 text-xl bg-blue-500 text-white rounded-full transition duration-300 ease-in-out transform hover:bg-blue-600 active:scale-95"
                            >
                                {item}
                            </button>
                        ))}
                        <button
                            onClick={evaluateExpression}
                            className="col-span-2 py-2 px-4 text-xl bg-green-500 text-white rounded-full transition duration-300 ease-in-out transform hover:bg-green-600 active:scale-95"
                        >
                            =
                        </button>
                        <button
                            onClick={() => setInput("")}
                            className="col-span-2 py-2 px-4 text-xl bg-red-500 text-white rounded-full transition duration-300 ease-in-out transform hover:bg-red-600 active:scale-95"
                        >
                            Clear
                        </button>
                    </div>
                </div>
                <div className="p-8 bg-white rounded-lg shadow-2xl">
                    <h2 className="mb-4 text-xl font-bold">History</h2>
                    <ul>
                        {cache.map((item, index) => (
                            <li key={index} className="mb-2">
                                {item.expression} = {item.result}
                            </li>
                        ))}
                    </ul>
                </div>
            </div>
        </div>
    );
}

export default SimpleCalculator;
💁 Check out our other articles😃
👉 Generate a free Developer Portfolio website with AI prompts
👉 Creating a Toggle Switcher with Happy and Sad Faces using HTML, CSS, and JavaScript