the-geeky-codes-high-resolution-logo-color-on-transparent-background geeky code red logo
  • Home
  • AI
    AIShow More
    generate vector icons
    Generate Vector Icons with ChatGPT DALLE 3: A Comprehensive Guide
    14 Min Read
    Dalle 3
    Dalle 3: A Step-by-Step Guide to Mastering AI Art Generation
    4 Min Read
    5 Best AI Tools to Convert Images to Video Animations
    5 Best AI Tools to Convert Images to Video Animations
    8 Min Read
    Exploring the Impressive Mistral 7B Model
    Exploring the Impressive Mistral 7B Model for Text Summarization and Coding
    6 Min Read
    The AI Revolution this week
    Must Read – The AI Revolution this week 30 Sep 2023: Integrating AI Tools into Everyday Life
    6 Min Read
  • Tutorial
    • React js
    • Python
    • Javascript
  • AI Tools
Reading: Creating a Toggle Switcher with Happy and Sad Faces using HTML, CSS, and JavaScript
Share
the geeky codesthe geeky codes
Aa
  • AI
  • AI Tools
  • Javascript
  • Python
  • React js
  • Advertise
Search
  • Categories
    • AI
    • AI Tools
    • Javascript
    • Python
    • React js
  • More
    • Advertise
Follow US
Copyright ©2023 The Geeky codes. All Rights Reserved.
the geeky codes > Blog > Tutorial > Html > Creating a Toggle Switcher with Happy and Sad Faces using HTML, CSS, and JavaScript
HtmlCSSJavascript

Creating a Toggle Switcher with Happy and Sad Faces using HTML, CSS, and JavaScript

thegeekycodes By thegeekycodes 19 August 2023 3 Min Read
toggle switch demo
SHARE

In today’s tutorial, we’re going to learn how to create an interactive toggle switcher that displays happy and sad faces using a combination of HTML, CSS, and JavaScript. This engaging UI element can add a touch of whimsy to your website while showcasing your coding skills. Let’s dive in!

Contents
IntroductionToggle Switcher HTML StructureStyling with CSSConclusion
Toggle Animation 2

Introduction

Toggle switchers are a popular UI element used to enable users to select between two distinct options. In this tutorial, we’ll not only create a functional toggle switcher but also integrate delightful happy and sad faces that dynamically change based on the user’s selection.

Toggle Switcher HTML Structure

To start off, let’s lay the foundation with our HTML structure:

<!DOCTYPE html>
<html lang="en">
    <head>
        <meta charset="UTF-8" />
        <meta name="viewport" content="width=device-width, initial-scale=1.0" />
        <title>Toggle Animation</title>
        <link rel="stylesheet" href="styles.css" />
    </head>
    <body>
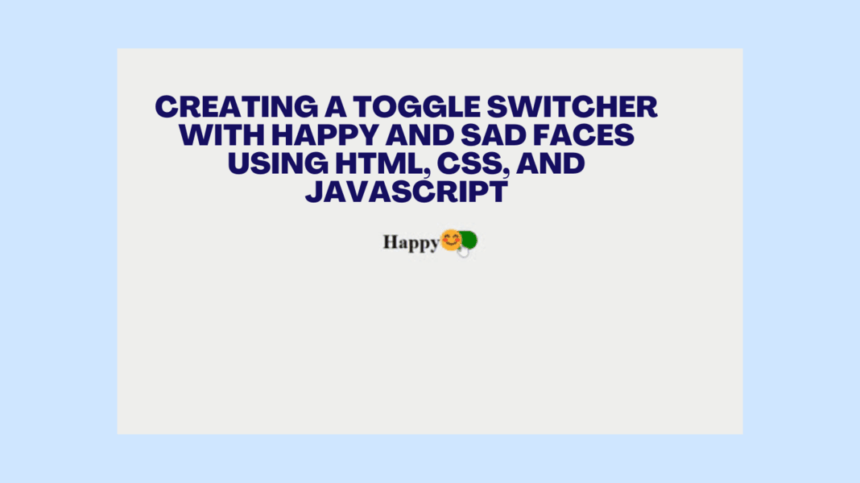
        <h1 id="emotion-label">Happy</h1>
        <div class="toggle-container">
            <input type="checkbox" id="toggle" class="toggle-input" />
            <label class="toggle-label" for="toggle">
                <span class="toggle-figure"></span>
            </label>
        </div>

        <script src="script.js"></script>
    </body>
</html>

Styling with CSS

We’ll now proceed to style our toggle switcher using CSS. The styles will ensure the toggle switcher is visually appealing and responsive:

body {
    display: flex;
    justify-content: center;
    align-items: center;
    height: 100vh;
    margin: 0;
    background-color: #f0f0f0;
}

.toggle-container {
    position: relative;
}

.toggle-input {
    display: none;
}

.toggle-label {
    display: inline-block;
    width: 60px;
    height: 30px;
    background-color: green;
    border-radius: 15px;
    position: relative;
    cursor: pointer;
    transition: background-color 0.3s ease;
}

.toggle-input:checked + .toggle-label {
    background-color: red;
}

.toggle-figure {
    position: absolute;
    width: 30px;
    height: 30px;
    background-color: white;
    border-radius: 50%;
    transition: transform 0.3s ease;
}

.toggle-input:checked + .toggle-label .toggle-figure {
    transform: translateX(30px);
}

.toggle-figure:before {
    content: "😊"; /* Happy face emoji */
    font-size: 35px;
    position: absolute;
    top: 40%;
    left: 60%;
    transform: translate(-50%, -50%);
    transition: opacity 0.3s ease;
}

.toggle-input:checked + .toggle-label .toggle-figure:before {
    content: "😢"; /* Sad face emoji */
}

JavaScript (script.js):

const toggle = document.getElementById('toggle');
const emotionLabel = document.getElementById('emotion-label');

toggle.addEventListener('change', () => {
  if (toggle.checked) {
    emotionLabel.textContent = 'Sad';
  } else {
    emotionLabel.textContent = 'Happy';
  }
});

Conclusion

Congratulations! You’ve successfully created a toggle switcher with happy and sad faces using HTML, CSS, and JavaScript. This engaging UI element can be a delightful addition to your web projects, showcasing both your coding expertise and creativity.

Feel free to customize the design further, explore different animations, and even expand this concept to include more toggled elements. This tutorial serves as a solid starting point for creating interactive and playful UI elements that captivate your users.

Remember, by using this combination of HTML, CSS, and JavaScript, you’re not only enhancing the user experience but also building a strong foundation in web development.

Now, go ahead and experiment with your newly acquired skills, and have fun creating fantastic user interfaces!

TAGGED: Coding Tips, javascript

Sign Up For Daily Newsletter

Be keep up! Get the latest breaking news delivered straight to your inbox.
By signing up, you agree to our Terms of Use and acknowledge the data practices in our Privacy Policy. You may unsubscribe at any time.
Share This Article
Facebook Twitter Copy Link Print
Previous Article Generate a free Developer Portfolio website with AI prompts Generate a free Developer Portfolio website with AI prompts
Next Article Sick Leave Email AI Prompts 50 Sick Leave Email AI Prompts You Can’t Afford to Miss!
Leave a comment

Leave a Reply Cancel reply

Your email address will not be published. Required fields are marked *

Twitter Follow
Telegram Follow

Subscribe Now

Subscribe to our newsletter to get our newest articles instantly!

Most Popular
Advanced Routing Techniques in Nextjs 15
Advanced Routing Techniques in Next js 15
20 November 2024
Attachment Details Image-to-Text-Converter-with-Claude-Nextjs-15
Building an AI-Powered Image-to-Text Converter with Claude, Next.js 15, and Vercel AI SDK
20 November 2024
Generate-Dynamic-OpenGraph-Images-in-Nextjs15
How to Generate Dynamic OpenGraph Images in Next.js App Router 15 with TypeScript
20 November 2024
Google Analytics 4 in Nextjs 14
How to Install Google Analytics 4 in Next.js 15 (App Router) with TypeScript [2024]
20 November 2024
docker compose
Getting Started with Docker Compose
20 November 2024

You Might Also Like

Understanding Server Actions in Nextjs
TutorialJavascriptNextjsReact js

Understanding Server Actions in Nextjs

7 Min Read
Implementing Dark Mode with JavaScript
TutorialJavascript

Implementing Dark Mode with JavaScript

3 Min Read
Build a Simple Calculator App with React
TutorialReact js

Build a Simple Calculator App with React, Tailwind CSS. Displays History

8 Min Read
Automating Google Sheets to Send Email Reminders
TutorialGoogle SheetsJavascript

Automating Google Sheets to Send Email Reminders

5 Min Read

Always Stay Up to Date

Subscribe to our newsletter to get our newest articles instantly!

the geeky codes geeky code red logo

Providing valuable resources for developers in the form of code snippets, software tutorials, and AI related content.

About

  • About Us
  • Contact
  • Terms and Conditions
  • Privacy Policy
  • Disclaimer
  • Affiliate Disclosure

Resource

  • The Art of AI Prompt Engineering: Crafting Effective Inputs for AI Models

Get the Top 10 in Search!

Looking for a trustworthy service to optimize the company website?
Request a Quote
© 2023 The Geeky Codes. All Rights Reserved
We are happy to see you join Us!

🔥📢Subscribe to our newsletter and never miss our latest code snippets, tutorials and AI updates

Zero spam, Unsubscribe at any time.
Welcome Back!

Sign in to your account

Lost your password?