In the realm of web development, technological advancements continuously reshape the landscape. One such revolution comes in the form of AI-powered prompts, which have empowered developers to create stunning and SEO-friendly websites. In this article, we’ll explore how I harnessed the power of AI-generated prompts to craft a responsive and visually captivating developer portfolio, all while optimizing it for search engines and user engagement.
I used chatgpt chatbot to generate this amazing developer portfolio website.
Blueprinting the Vision: The AI Prompt That Set It All in Motion
I started with this prompt “Generate a responsive developers portfolio website which has a header, hero section, about section, experience section, skills section, projects section, services section, and contact section. You have to use #d5ddf6, #8ea4e6, #c9d3f3, #2b51c5 colors only.” This blueprint, driven by AI, outlined the cornerstone of my developer portfolio. With specific sections and a curated color palette in mind, I was ready to dive into the design process.
ChatGPT generated the below starter code so that I can give the next set of instructions to it. In the coming sections, we will see how I added the content to the empty <section> elements one-by-one.
<!DOCTYPE html>
<html lang="en">
<head>
  <meta charset="UTF-8">
  <meta name="viewport" content="width=device-width, initial-scale=1.0">
  <link rel="stylesheet" href="styles.css">
  <title>Developer Portfolio</title>
</head>
<body>
  <header id="header">
    <!-- Header content here -->
  </header>

  <section id="hero">
    <!-- Hero section content here -->
  </section>

  <section id="about">
    <!-- About section content here -->
  </section>

  <section id="experience">
    <!-- Experience section content here -->
  </section>

  <section id="skills">
    <!-- Skills section content here -->
  </section>

  <section id="projects">
    <!-- Projects section content here -->
  </section>

  <section id="services">
    <!-- Services section content here -->
  </section>

  <section id="contact">
    <!-- Contact section content here -->
  </section>
</body>
</html>
/* Reset some default styles */
body, h1, h2, h3, p {
  margin: 0;
  padding: 0;
}

body {
  font-family: Arial, sans-serif;
}

/* Header Styles */
#header {
  background-color: #2b51c5;
  color: #d5ddf6;
  padding: 20px;
}

/* Hero Styles */
#hero {
  background-color: #8ea4e6;
  color: #2b51c5;
  padding: 50px;
  text-align: center;
}

/* About Styles */
#about {
  background-color: #c9d3f3;
  color: #2b51c5;
  padding: 50px;
}

/* Experience Styles */
#experience {
  background-color: #d5ddf6;
  color: #2b51c5;
  padding: 50px;
}

/* Skills Styles */
#skills {
  background-color: #8ea4e6;
  color: #2b51c5;
  padding: 50px;
}

/* Projects Styles */
#projects {
  background-color: #c9d3f3;
  color: #2b51c5;
  padding: 50px;
}

/* Services Styles */
#services {
  background-color: #d5ddf6;
  color: #2b51c5;
  padding: 50px;
}

/* Contact Styles */
#contact {
  background-color: #8ea4e6;
  color: #2b51c5;
  padding: 50px;
}
Creating a Header Section
As ChatGPT created a very basic structure for my developer portfolio website. The next task was to generate a header section. So I gave the prompt, “Add header section,” As ChatGPT was smart enough to memorize the previous instructions it generated a header section with menu items and css classes
<header id="header">
  <nav>
    <div class="logo">
      <h1>Developer Portfolio</h1>
    </div>
    <ul class="nav-links">
      <li><a href="#hero">Home</a></li>
      <li><a href="#about">About</a></li>
      <li><a href="#experience">Experience</a></li>
      <li><a href="#skills">Skills</a></li>
      <li><a href="#projects">Projects</a></li>
      <li><a href="#services">Services</a></li>
      <li><a href="#contact">Contact</a></li>
    </ul>
  </nav>
</header>
/* Header Styles */
#header {
  background-color: #2b51c5;
  color: #d5ddf6;
  padding: 20px;
}

.logo h1 {
  font-size: 24px;
}

.nav-links {
  list-style: none;
  display: flex;
  justify-content: space-around;
  margin-top: 10px;
}

.nav-links li a {
  text-decoration: none;
  color: #d5ddf6;
  transition: color 0.3s;
}

.nav-links li a:hover {
  color: #8ea4e6;
}
Add Hero Section
The hero section introduces your persona and skills. So I asked chatgpt to generate a hero section with this prompt “Add hero section with developer info and image. This must be responsive”.
ChatGPT generated the below content
<section id="hero">
  <div class="hero-content">
    <div class="hero-text">
      <h1>John Doe</h1>
      <p>Web Developer</p>
    </div>
    <div class="hero-image">
      <img src="profile-image.jpg" alt="John Doe - Web Developer">
    </div>
  </div>
</section>
/* Hero Styles */
#hero {
background-color: #8ea4e6;
color: #2b51c5;
padding: 50px;
text-align: center;
}
.hero-content {
display: flex;
flex-direction: column;
align-items: center;
}
.hero-text h1 {
font-size: 36px;
margin-bottom: 10px;
}
.hero-text p {
font-size: 18px;
margin-bottom: 30px;
}
.hero-image img {
max-width: 100%;
height: auto;
border-radius: 50%;
box-shadow: 0px 0px 10px rgba(0, 0, 0, 0.3);
}This is how the UI looked
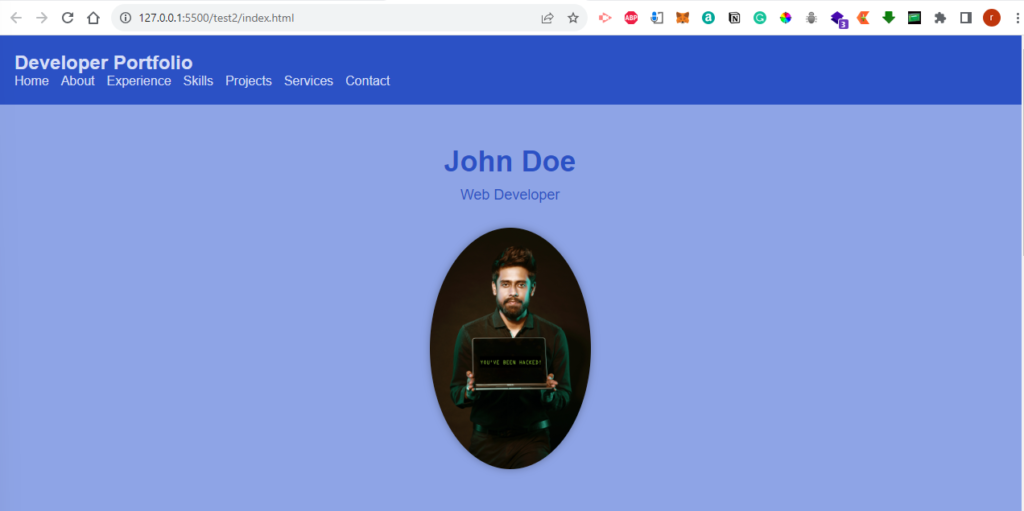
Please note that I added the image downloaded from pexels.com. The chatgpt had inserted a random jpg path.
About and Experience Sections
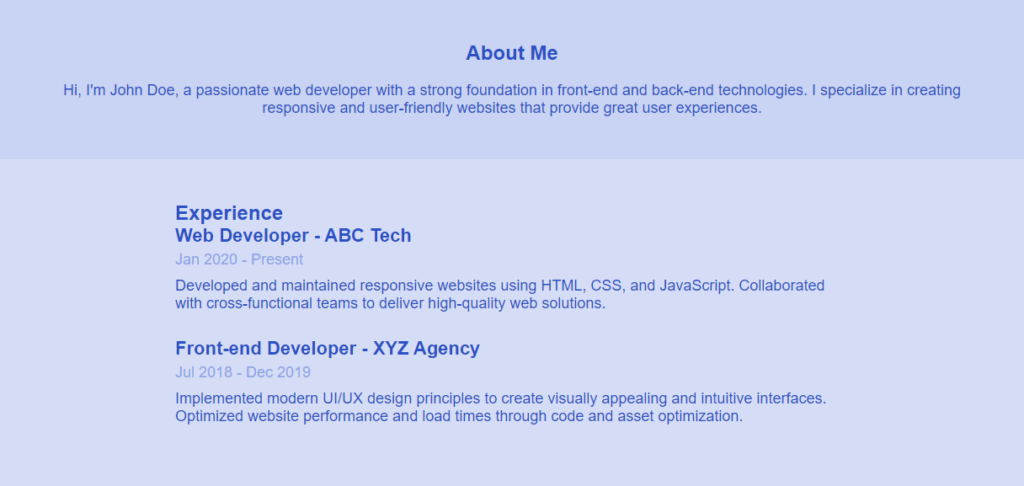
Now it’s time to generate the About and Experience sections. “add about section” and “Add Experience section” was the AI prompt given to generate the header and experience sections. So based on the previous chat context it generated the developer-related about and experience sections.
Below is the generated code for about section
<section id="about">
<div class="about-content">
<h2>About Me</h2>
<p>
Hi, I'm John Doe, a passionate web developer with a strong foundation in front-end and back-end technologies.
I specialize in creating responsive and user-friendly websites that provide great user experiences.
</p>
</div>
</section>
/* About Styles */
#about {
background-color: #c9d3f3;
color: #2b51c5;
padding: 50px;
}
.about-content {
text-align: center;
}
.about-content h2 {
font-size: 24px;
margin-bottom: 20px;
}
.about-content p {
font-size: 18px;
}
Below is the generated code for the experience section
<section id="experience">
<div class="experience-content">
<h2>Experience</h2>
<div class="experience-entry">
<h3>Web Developer - ABC Tech</h3>
<p class="experience-date">Jan 2020 - Present</p>
<p>
Developed and maintained responsive websites using HTML, CSS, and JavaScript.
Collaborated with cross-functional teams to deliver high-quality web solutions.
</p>
</div>
<div class="experience-entry">
<h3>Front-end Developer - XYZ Agency</h3>
<p class="experience-date">Jul 2018 - Dec 2019</p>
<p>
Implemented modern UI/UX design principles to create visually appealing and intuitive interfaces.
Optimized website performance and load times through code and asset optimization.
</p>
</div>
</div>
</section>
/* Experience Styles */
#experience {
background-color: #d5ddf6;
color: #2b51c5;
padding: 50px;
}
.experience-content {
max-width: 800px;
margin: 0 auto;
}
.experience-entry {
margin-bottom: 30px;
}
.experience-entry h3 {
font-size: 22px;
margin-bottom: 5px;
}
.experience-date {
font-size: 16px;
color: #8ea4e6;
margin-bottom: 10px;
}
.experience-entry p {
font-size: 18px;
}
Below is the output of about and experience UI
Showcasing Skills and Projects
Highlighting your skills and projects is vital. Each project can be a highlight for your next job or freelance project.
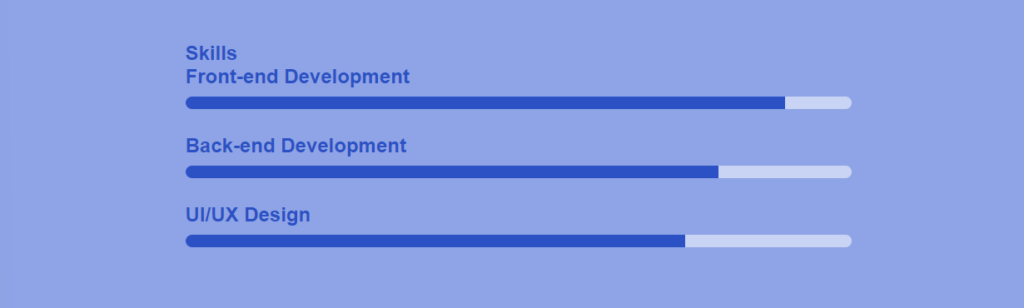
I asked Chatgpt to generate a skill section with a cool UI. This is my AI prompt “Add skills section. Build a cool UI”.

<section id="skills">
<div class="skills-content">
<h2>Skills</h2>
<div class="skill">
<h3>Front-end Development</h3>
<div class="skill-bar">
<div class="skill-level skill-level-90"></div>
</div>
</div>
<div class="skill">
<h3>Back-end Development</h3>
<div class="skill-bar">
<div class="skill-level skill-level-80"></div>
</div>
</div>
<div class="skill">
<h3>UI/UX Design</h3>
<div class="skill-bar">
<div class="skill-level skill-level-75"></div>
</div>
</div>
</div>
</section>
/* Skills Styles */
#skills {
background-color: #8ea4e6;
color: #2b51c5;
padding: 50px;
}
.skills-content {
max-width: 800px;
margin: 0 auto;
}
.skill {
margin-bottom: 30px;
}
.skill h3 {
font-size: 24px;
margin-bottom: 10px;
}
.skill-bar {
background-color: #c9d3f3;
height: 15px;
border-radius: 8px;
overflow: hidden;
}
.skill-level {
height: 100%;
}
.skill-level-90 {
width: 90%;
background-color: #2b51c5;
}
.skill-level-80 {
width: 80%;
background-color: #2b51c5;
}
.skill-level-75 {
width: 75%;
background-color: #2b51c5;
}
Below is the UI that it generated. Isn’t it amazing👌
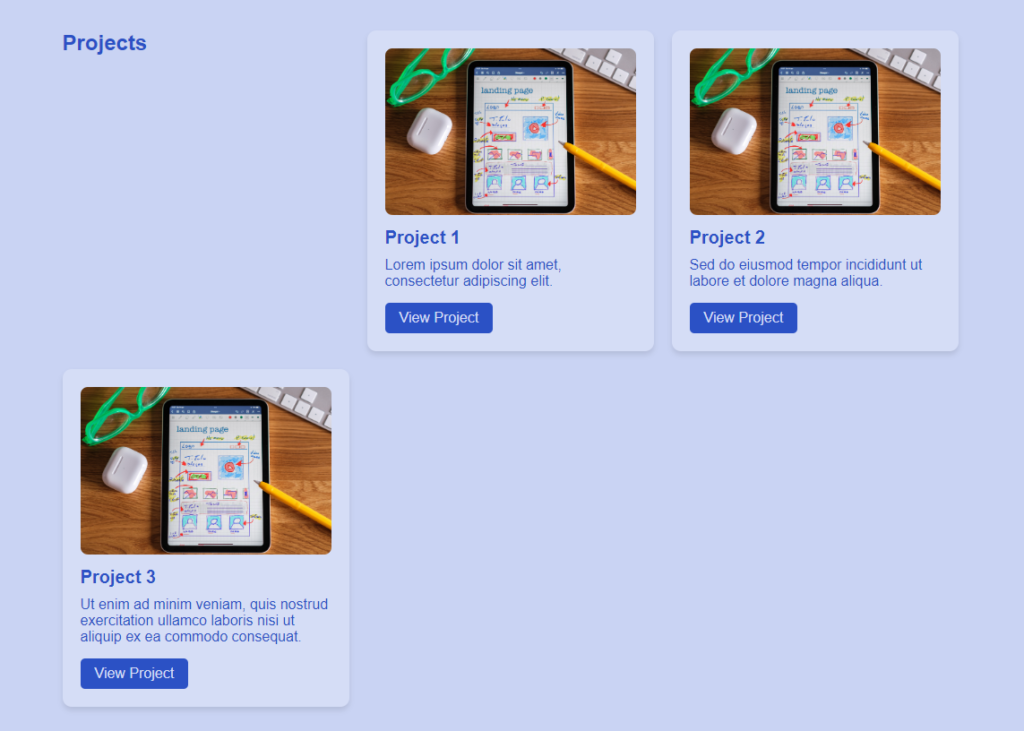
To generate the project section. I gave it descriptive text so that it shows the project within a card UI. The prompt that I used
Add projects section. Please note each project must be shown inside a card with image, title, description, button. Add transition effects for the button. This must be responsive. Use grid layout
Below is the generated code
<section id="projects">
<div class="projects-content">
<h2>Projects</h2>
<div class="project-card">
<img src="project1.jpg" alt="Project 1">
<h3>Project 1</h3>
<p>Lorem ipsum dolor sit amet, consectetur adipiscing elit.</p>
<a href="#" class="project-button">View Project</a>
</div>
<div class="project-card">
<img src="project2.jpg" alt="Project 2">
<h3>Project 2</h3>
<p>Sed do eiusmod tempor incididunt ut labore et dolore magna aliqua.</p>
<a href="#" class="project-button">View Project</a>
</div>
<div class="project-card">
<img src="project3.jpg" alt="Project 3">
<h3>Project 3</h3>
<p>Ut enim ad minim veniam, quis nostrud exercitation ullamco laboris nisi ut aliquip ex ea commodo consequat.</p>
<a href="#" class="project-button">View Project</a>
</div>
</div>
</section>
/* Projects Styles */
#projects {
background-color: #c9d3f3;
color: #2b51c5;
padding: 50px;
}
.projects-content {
max-width: 1000px;
margin: 0 auto;
display: grid;
grid-template-columns: repeat(auto-fill, minmax(300px, 1fr));
gap: 20px;
}
.project-card {
background-color: #d5ddf6;
padding: 20px;
border-radius: 10px;
box-shadow: 0 4px 6px rgba(0, 0, 0, 0.1);
}
.project-card img {
max-width: 100%;
height: auto;
border-radius: 8px;
}
.project-card h3 {
font-size: 20px;
margin: 10px 0;
}
.project-card p {
font-size: 16px;
margin-bottom: 15px;
}
.project-button {
display: inline-block;
padding: 8px 16px;
background-color: #2b51c5;
color: #d5ddf6;
border: none;
border-radius: 5px;
text-decoration: none;
transition: background-color 0.3s, transform 0.3s;
}
.project-button:hover {
background-color: #8ea4e6;
transform: scale(1.05);
}
Voila!!!!!!! Below is the jaw-dropping UI that chatgpt generated for me
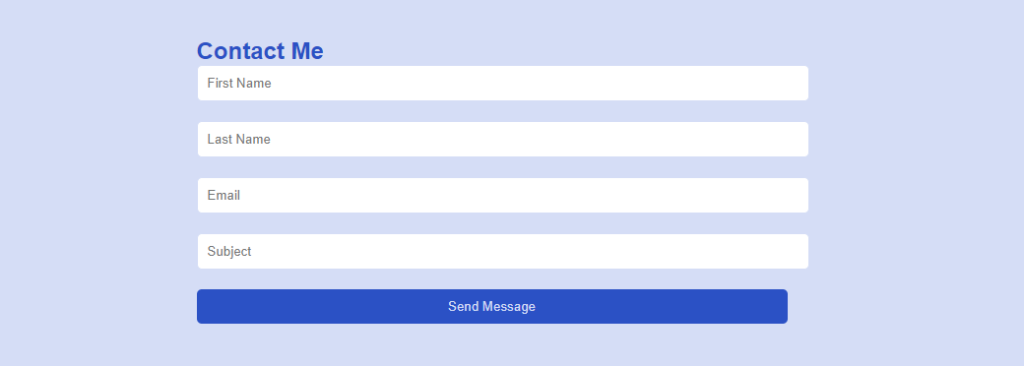
Contact Section
A well-designed contact section encourages user interaction. It provides an easy and convenient way for visitors to get in touch with you. So let’s generate a contact form with this AI prompt.

add contact section. This should contain first name, last name, email, subject fields.
Here I am emphasizing keywords like first name, last name, email, and subject. So that the chatgpt completely understands my requirements and generates a form with these fields.
<section id="contact">
<div class="contact-content">
<h2>Contact Me</h2>
<form class="contact-form" action="submit_form.php" method="post">
<div class="form-group">
<input type="text" name="first-name" placeholder="First Name" required>
</div>
<div class="form-group">
<input type="text" name="last-name" placeholder="Last Name" required>
</div>
<div class="form-group">
<input type="email" name="email" placeholder="Email" required>
</div>
<div class="form-group">
<input type="text" name="subject" placeholder="Subject" required>
</div>
<button type="submit" class="submit-button">Send Message</button>
</form>
</div>
</section>
/* Contact Styles */
#contact {
background-color: #8ea4e6;
color: #2b51c5;
padding: 50px;
}
.contact-content {
max-width: 600px;
margin: 0 auto;
}
.contact-form {
display: flex;
flex-direction: column;
}
.form-group {
margin-bottom: 20px;
}
input[type="text"],
input[type="email"] {
padding: 10px;
width: 100%;
border: 1px solid #d5ddf6;
border-radius: 5px;
}
.submit-button {
padding: 10px 20px;
background-color: #2b51c5;
color: #d5ddf6;
border: none;
border-radius: 5px;
cursor: pointer;
transition: background-color 0.3s;
}
.submit-button:hover {
background-color: #8ea4e6;
}
Footer Section
Generating the footer section was easy with this AI prompt.
update index.html with footer section. This should contain all rights reserved and a funny developer quote

Here I asked chat gpt to generate a funny quote😀 and this is what it generated.
<footer id="footer">
<div class="footer-content">
<p>© 2023 Your Name. All Rights Reserved.</p>
<p class="developer-quote">"I'm not a great programmer; I'm just a good programmer with great habits." - Kent Beck</p>
</div>
</footer>
/* Footer Styles */
#footer {
background-color: #c9d3f3;
color: #2b51c5;
padding: 20px;
text-align: center;
}
.footer-content {
max-width: 800px;
margin: 0 auto;
}
.developer-quote {
font-style: italic;
font-size: 16px;
margin-top: 10px;
}

this completes generating all sections and here is the final output
Complete Project code
Below I am sharing the final code snippet so that you can test it out.
<!DOCTYPE html>
<html lang="en">
<head>
<meta charset="UTF-8" />
<meta name="viewport" content="width=device-width, initial-scale=1.0" />
<meta
name="description"
content="John Doe - Web Developer Portfolio showcasing coding projects, skills, and expertise in web development."
/>
<meta
name="keywords"
content="web developer, portfolio, coding projects, software engineer, front-end developer, web development, programming skills"
/>
<meta name="author" content="John Doe" />
<title>John Doe - Web Developer Portfolio</title>
<link rel="stylesheet" href="styles.css" />
<title>Developer Portfolio</title>
</head>
<body>
<header id="header">
<nav>
<div class="logo">
<h1>Developer Portfolio</h1>
</div>
<ul class="nav-links">
<li><a href="#hero">Home</a></li>
<li><a href="#about">About</a></li>
<li><a href="#experience">Experience</a></li>
<li><a href="#skills">Skills</a></li>
<li><a href="#projects">Projects</a></li>
<li><a href="#services">Services</a></li>
<li><a href="#contact">Contact</a></li>
</ul>
</nav>
</header>
<section id="hero">
<div class="hero-content">
<div class="hero-text">
<h1>John Doe</h1>
<p>Web Developer</p>
</div>
<div class="hero-image">
<img
src="assets/developer.jpg"
alt="John Doe - Web Developer"
width="200px"
height="200px"
/>
</div>
</div>
</section>
<section id="about">
<div class="about-content">
<h2>About Me</h2>
<p>
Hi, I'm John Doe, a passionate web developer with a strong
foundation in front-end and back-end technologies. I
specialize in creating responsive and user-friendly websites
that provide great user experiences.
</p>
</div>
</section>
<section id="experience">
<div class="experience-content">
<h2>Experience</h2>
<div class="experience-entry">
<h3>Web Developer - ABC Tech</h3>
<p class="experience-date">Jan 2020 - Present</p>
<p>
Developed and maintained responsive websites using HTML,
CSS, and JavaScript. Collaborated with cross-functional
teams to deliver high-quality web solutions.
</p>
</div>
<div class="experience-entry">
<h3>Front-end Developer - XYZ Agency</h3>
<p class="experience-date">Jul 2018 - Dec 2019</p>
<p>
Implemented modern UI/UX design principles to create
visually appealing and intuitive interfaces. Optimized
website performance and load times through code and
asset optimization.
</p>
</div>
</div>
</section>
<section id="skills">
<div class="skills-content">
<h2>Skills</h2>
<div class="skill">
<h3>Front-end Development</h3>
<div class="skill-bar">
<div class="skill-level skill-level-90"></div>
</div>
</div>
<div class="skill">
<h3>Back-end Development</h3>
<div class="skill-bar">
<div class="skill-level skill-level-80"></div>
</div>
</div>
<div class="skill">
<h3>UI/UX Design</h3>
<div class="skill-bar">
<div class="skill-level skill-level-75"></div>
</div>
</div>
</div>
</section>
<section id="projects">
<div class="projects-content">
<h2>Projects</h2>
<div class="project-card">
<img src="assets/project.jpg" alt="Project 1" />
<h3>Project 1</h3>
<p>
Lorem ipsum dolor sit amet, consectetur adipiscing elit.
</p>
<a href="#" class="project-button">View Project</a>
</div>
<div class="project-card">
<img src="assets/project.jpg" alt="Project 2" />
<h3>Project 2</h3>
<p>
Sed do eiusmod tempor incididunt ut labore et dolore
magna aliqua.
</p>
<a href="#" class="project-button">View Project</a>
</div>
<div class="project-card">
<img src="assets/project.jpg" alt="Project 3" />
<h3>Project 3</h3>
<p>
Ut enim ad minim veniam, quis nostrud exercitation
ullamco laboris nisi ut aliquip ex ea commodo consequat.
</p>
<a href="#" class="project-button">View Project</a>
</div>
</div>
</section>
<section id="services">
<div class="services-content">
<h2>Services</h2>
<div class="service-card">
<img src="assets/services.jpg" alt="Service 1" />
<h3>Web Development</h3>
</div>
<div class="service-card">
<img src="assets/services.jpg" alt="Service 2" />
<h3>UI/UX Design</h3>
</div>
<div class="service-card">
<img src="assets/services.jpg" alt="Service 3" />
<h3>Responsive Design</h3>
</div>
</div>
</section>
<section id="contact">
<div class="contact-content">
<h2>Contact Me</h2>
<form
class="contact-form"
action="submit_form.php"
method="post"
>
<div class="form-group">
<input
type="text"
name="first-name"
placeholder="First Name"
required
/>
</div>
<div class="form-group">
<input
type="text"
name="last-name"
placeholder="Last Name"
required
/>
</div>
<div class="form-group">
<input
type="email"
name="email"
placeholder="Email"
required
/>
</div>
<div class="form-group">
<input
type="text"
name="subject"
placeholder="Subject"
required
/>
</div>
<button type="submit" class="submit-button">
Send Message
</button>
</form>
</div>
</section>
<footer id="footer">
<div class="footer-content">
<p>© 2023 Your Name. All Rights Reserved.</p>
<p class="developer-quote">
"I'm not a great programmer; I'm just a good programmer with
great habits." - Kent Beck
</p>
</div>
</footer>
</body>
</html>
/* Reset some default styles */
body,
h1,
h2,
h3,
p {
margin: 0;
padding: 0;
}
body {
font-family: Arial, sans-serif;
}
/* Header Styles */
#header {
background-color: #2b51c5;
color: #d5ddf6;
padding: 20px;
}
.nav-container {
display: flex;
justify-content: space-between;
align-items: center;
}
.logo h1 {
font-size: 24px;
}
.nav-links {
list-style: none;
display: flex;
margin: 0;
padding: 0;
}
.nav-links li {
margin-right: 15px;
}
.nav-links li a {
text-decoration: none;
color: #d5ddf6;
transition: color 0.3s;
}
.nav-links li a:hover {
color: #8ea4e6;
}
/* Mobile Navigation */
.menu-icon {
display: none;
font-size: 24px;
cursor: pointer;
}
@media screen and (max-width: 768px) {
.menu-icon {
display: block;
}
.nav-links {
display: none;
flex-direction: column;
position: absolute;
top: 70px;
left: 0;
width: 100%;
background-color: #2b51c5;
padding: 10px;
text-align: center;
}
.nav-links.active {
display: flex;
}
.nav-links li {
margin: 10px 0;
}
.nav-links li a {
color: #d5ddf6;
font-size: 18px;
}
}
/* Hero Styles */
#hero {
  background-color: #8ea4e6;
  color: #2b51c5;
  padding: 50px;
  text-align: center;
}

.hero-content {
  display: flex;
  flex-direction: column;
  align-items: center;
}

.hero-text h1 {
  font-size: 36px;
  margin-bottom: 10px;
}

.hero-text p {
  font-size: 18px;
  margin-bottom: 30px;
}

.hero-image img {
  max-width: 100%;
  height: auto;
  border-radius: 50%;
  box-shadow: 0px 0px 10px rgba(0, 0, 0, 0.3);
}
/* About Styles */
#about {
  background-color: #c9d3f3;
  color: #2b51c5;
  padding: 50px;
}

.about-content {
  text-align: center;
}

.about-content h2 {
  font-size: 24px;
  margin-bottom: 20px;
}

.about-content p {
  font-size: 18px;
}
/* Experience Styles */
#experience {
  background-color: #d5ddf6;
  color: #2b51c5;
  padding: 50px;
}

.experience-content {
  max-width: 800px;
  margin: 0 auto;
}

.experience-entry {
  margin-bottom: 30px;
}

.experience-entry h3 {
  font-size: 22px;
  margin-bottom: 5px;
}

.experience-date {
  font-size: 16px;
  color: #8ea4e6;
  margin-bottom: 10px;
}

.experience-entry p {
  font-size: 18px;
}
/* Skills Styles */
#skills {
  background-color: #8ea4e6;
  color: #2b51c5;
  padding: 50px;
}

.skills-content {
  max-width: 800px;
  margin: 0 auto;
}

.skill {
  margin-bottom: 30px;
}

.skill h3 {
  font-size: 24px;
  margin-bottom: 10px;
}

.skill-bar {
  background-color: #c9d3f3;
  height: 15px;
  border-radius: 8px;
  overflow: hidden;
}

.skill-level {
  height: 100%;
}

.skill-level-90 {
  width: 90%;
  background-color: #2b51c5;
}

.skill-level-80 {
  width: 80%;
  background-color: #2b51c5;
}

.skill-level-75 {
  width: 75%;
  background-color: #2b51c5;
}
/* Projects Styles */
#projects {
  background-color: #c9d3f3;
  color: #2b51c5;
  padding: 50px;
}

.projects-content {
  max-width: 1000px;
  margin: 0 auto;
  display: grid;
  grid-template-columns: repeat(auto-fill, minmax(300px, 1fr));
  gap: 20px;
}

.project-card {
  background-color: #d5ddf6;
  padding: 20px;
  border-radius: 10px;
  box-shadow: 0 4px 6px rgba(0, 0, 0, 0.1);
}

.project-card img {
  max-width: 100%;
  height: auto;
  border-radius: 8px;
}

.project-card h3 {
  font-size: 20px;
  margin: 10px 0;
}

.project-card p {
  font-size: 16px;
  margin-bottom: 15px;
}

.project-button {
  display: inline-block;
  padding: 8px 16px;
  background-color: #2b51c5;
  color: #d5ddf6;
  border: none;
  border-radius: 5px;
  text-decoration: none;
  transition: background-color 0.3s, transform 0.3s;
}

.project-button:hover {
  background-color: #8ea4e6;
  transform: scale(1.05);
}
/* Services Styles */
#services {
background-color: #8ea4e6;
color: #2b51c5;
padding: 50px;
}
.services-content {
max-width: 1000px;
margin: 0 auto;
display: grid;
grid-template-columns: repeat(auto-fill, minmax(300px, 1fr));
gap: 20px;
}
.service-card {
background-color: #d5ddf6;
padding: 20px;
border-radius: 10px;
box-shadow: 0 4px 6px rgba(0, 0, 0, 0.1);
display: flex;
flex-direction: column;
justify-content: center;
align-items: center;
}
.service-card img {
max-width: 100px;
height: auto;
border-radius: 50%;
margin-bottom: 15px;
}
.service-card h3 {
font-size: 20px;
text-align: center;
margin: 0;
}
/* Contact Styles */
#contact {
background-color: #d5ddf6;
color: #2b51c5;
padding: 50px;
}
.contact-content {
max-width: 600px;
margin: 0 auto;
}
.contact-form {
display: flex;
flex-direction: column;
}
.form-group {
margin-bottom: 20px;
}
input[type="text"],
input[type="email"] {
padding: 10px;
width: 100%;
border: 1px solid #d5ddf6;
border-radius: 5px;
}
.submit-button {
padding: 10px 20px;
background-color: #2b51c5;
color: #d5ddf6;
border: none;
border-radius: 5px;
cursor: pointer;
transition: background-color 0.3s;
}
.submit-button:hover {
background-color: #8ea4e6;
}
/* Footer Styles */
#footer {
  background-color: #c9d3f3;
  color: #2b51c5;
  padding: 20px;
  text-align: center;
}

.footer-content {
  max-width: 800px;
  margin: 0 auto;
}

.developer-quote {
  font-style: italic;
  font-size: 16px;
  margin-top: 10px;
}
Importance of well defined AI prompts
Using well-defined AI prompts to generate websites is an innovative approach that leverages the capabilities of AI language models to streamline and automate website development. Here’s how you could use AI prompts to generate websites:
- Planning and Conceptualization:
- Start by outlining the purpose, goals, and content structure of the website. Determine the main sections, features, and functionalities you want to include.
- Prepare a list of prompts that describe each section or feature you want on the website. For example: ‘Generate about section with developer skills and bio” , “generate the ‘Project ‘ section which shows each project items in the card”.
- AI Language Model Interaction:
- Choose a suitable AI language model like GPT-3.5 to interact with and generate content for your website.
- Use the prompts you prepared earlier to request content generation. Structure your prompts to be specific and detailed to get accurate and relevant results.
- Content Generation:
- Submit prompts to the AI model to generate content for each section of the website. For instance, you can provide prompts like: “Generate a catchy introduction for the ‘Home’ page,” or “Create a description for product Y.”
- Customization and Refinement:
- Review the AI-generated content and customize it to match your brand’s voice and style. You can edit, rephrase, or rearrange the content as needed.
- Add personal touches and additional information that might not have been covered by the AI model.
- Design and Layout:
- While AI is proficient in generating text, you’ll need separate tools or platforms for designing the visual aspects of your website. Use website builders, design software, or web development frameworks to create the layout, colors, typography, and images.
- Integration and Development:
- Integrate the AI-generated content into your chosen website building platform or content management system (CMS). Most modern CMS platforms allow you to input and organize content easily.
- Testing and Optimization:
- Test the website thoroughly to ensure all content is properly displayed and functional. Check for any formatting issues or inconsistencies.
- Optimize the website for performance, mobile responsiveness, and user experience.
- Ongoing Maintenance:
- Regularly update and refine the content on your website to keep it fresh and relevant.
- Use AI-generated prompts to help automate the process of generating new content or updating existing content.
It’s important to note that while AI can be a valuable tool in content generation, it’s not a replacement for human creativity and critical thinking. Using AI-generated content as a starting point and then adding your unique insights and personal touches can result in a more authentic and engaging website.
Remember to stay up to date with the capabilities of AI models and consider the terms of use and ethical considerations associated with using AI-generated content for commercial purposes.
😃Happy coding😃